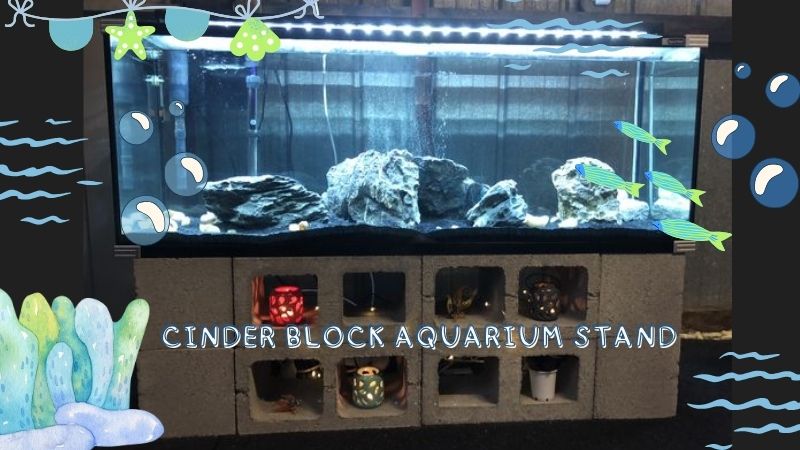
For the budget-minded aquarist, a cinder block aquarium stand offers a surprisingly sturdy and functional solution. Cinder blocks, readily available and inexpensive, can be stacked and configured to create a stable base for your fish tank. While the industrial aesthetic might not suit every taste, cinder block stands can be quite practical, especially for larger aquariums. This article Tropical Fish Haven will show how to make cinder block aquarium stand.
How To Make Cinder Block Aquarium Stand
Materials for a 55-gallon Aquarium Stand
- Nine cinder blocks (8″x8″x16″)
- One sheet of plywood (16″x50″)
- Two 2×8 boards (each 50″ in length)
- Sandpaper
- Latex paint (recommended)
- Paintbrush (nylon bristles are best for latex)
- Measuring tape or yardstick
Project Cost
You can purchase the wood and cinder blocks from Lowe’s or Home Depot for $30 or less. The cost of paint varies; a gallon of latex paint ranges from $13 to $25, depending on the brand and color. Add $6 for a paintbrush and $3 for sandpaper if you don’t already have them, bringing the total project cost to approximately $50 to $60.
Tip: Check with employees in the lumber department for plywood scraps. The thickness isn’t critical as long as it’s flat (not warped). You might find plywood for just a dollar or two if there are suitable scraps available. Pressboard can be an even cheaper alternative, though it may not have the same aesthetic appeal.
Before Construction Begins
Here are important considerations before you start building. The key aspects of an aquarium stand are ensuring it is level and evenly distributes weight. For aquariums larger than 20 gallons, it’s advisable to place them against a load-bearing wall and ensure the floor is level, even, and capable of supporting the weight.
Avoid positioning the stand flush against the wall to allow space behind the aquarium for cords, hanging filters, etc. My stand is positioned 3 inches from a load-bearing wall. I used a carpenter’s level to confirm the surface is level, but you can also assemble the stand, place your tank on top, and fill it with a couple of inches of water to ensure the water sits level in the tank.
Choose a location you truly adore, as once your tank is filled with hundreds of pounds of water and live fish, relocating it can be exceptionally challenging.
Additionally, consider your electrical setup and tank maintenance strategy. Ensure there’s a nearby outlet unless you plan to use an extension cord. Strategize how to manage cords and power strips to keep them tidy and concealed. Also, plan for water changes by deciding which faucet to use and how to access it conveniently, ideally avoiding the hassle of lugging buckets of water around your home — trust me, it’s not enjoyable!
Preparation
Before painting, consider pre-assembling your stand to ensure it’s correctly positioned and meets your aesthetic preferences.
To support a 55-gallon tank evenly, create three columns of cinder blocks spaced 12.5 inches apart. Cinder blocks provide optimal weight distribution when stacked with the holes facing vertically (to hide them once assembled).
Begin by placing the three cinder blocks that will serve as the base of the stand. Determine your desired distance from the wall (I chose 3 inches) and position them 12.5 inches apart.
Next, place the sheet of plywood over the cinder blocks, ensuring the edges are aligned. This will serve as your shelf. Stack two additional cinder blocks on each column, positioning them directly above the bottom cinder blocks as accurately as possible. Finally, place your 2×8 wood planks over the top, aligning the edges. There will be a small gap, approximately 1 inch, between the 2x8s. (If this gap concerns you, you could opt to purchase three 2x4s instead, but this may not look as aesthetically pleasing.)
Examine your stand and its surroundings, envisioning your aquarium in place. Are you satisfied with its placement? Is it conveniently situated for you to appreciate without obstruction? Consider if you want to incorporate another shelf or make any adjustments to the stand’s structure before proceeding further.
Painting
Start by using a stiff bristle brush or broom to sweep away any concrete dust from the cinder blocks to ensure a smooth paint application. While priming the blocks is an option, I typically apply latex paint directly, brushing it on in all directions to fill in any crevices. Allow the first coat to dry for approximately 6 hours before applying a second coat.
Next, prepare the 2x8s and plywood by sanding them down to smooth the edges and eliminate any splinters. Use a brush or broom to remove wood dust, ensuring a clean surface for painting. While many recommend priming raw wood before applying latex, the brand I use is thick enough to apply directly without causing warping. Apply a thick coat of paint to the wood, optionally using a primer first for added coverage if desired.
After allowing the blocks and wood to dry overnight (for 12 hours), I reassembled the stand following the steps outlined earlier.
Finishing Touches
Align your tank so that its corners match up as evenly as you can with the outer corners of the cinder blocks. This ensures optimal weight distribution, supported further by the 2x8s which evenly distribute weight along the tank’s edges.
Now, you can proceed to set up your tank!
Conclusion
Cinder block aquarium stands offer a cost-effective and customizable option for supporting your fish tank. Their inherent strength makes them suitable for even larger aquariums. However, keep in mind potential drawbacks like weight and aesthetics. By addressing these considerations and incorporating creative finishes, a cinder block stand can become a surprisingly versatile and functional addition to your aquarium setup.


